One script, eight ways to add it. Download the package for your store or website, paste the site ID from the dashboard and check the installation with one click.
ID
First, your site ID
Every integration needs only the site ID from the Keksitbot dashboard: Sites → your site → Installation, the data-id value in the code (lowercase letters, digits, hyphen and underscore, up to 40 characters).
Add the script one way only. With a plugin in place, do not paste the code again into the theme or Google Tag Manager - the dashboard would show "Code twice".
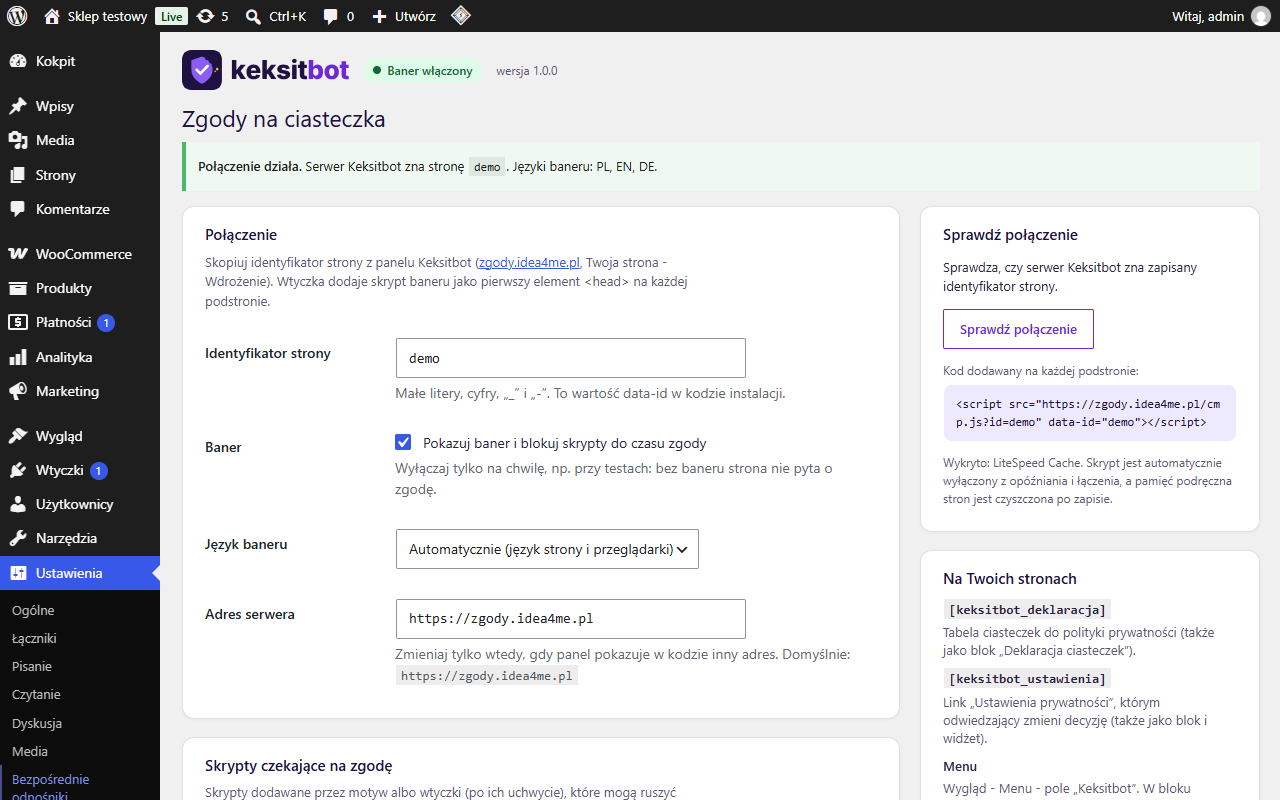
WordPress and WooCommerce
Download
The plugin adds the script as the first element of <head> and protects it from optimisation plugins (WP Rocket, LiteSpeed, Autoptimize). It provides a cookie table, a "Privacy settings" link, blocks and a widget. Works with the WP Consent API and WooCommerce.
Requirements: WordPress 6.0 or newer, PHP 7.4 or newer.
Plugins → Add New → Upload Plugin → choose the zip file → Install and activate.
Settings → Keksitbot: paste the site ID and save.
Click "Check the connection".
Add [keksitbot_declaration] to your privacy policy page and a settings link in the footer ([keksitbot_settings_link] or the block).
Finally click "Check installation" in the dashboard.
The plugin is awaiting approval in the wordpress.org directory. Until then install it from the zip file; after publication updates will come from the directory.
Without the plugin: PHP code in the theme
If you cannot install plugins, paste this snippet into functions.php of your child theme. Optimisation plugins must not delay the Keksitbot script (https://zgody.idea4me.pl).
Full instructions in the dashboard - After logging in: Sites → your site → Installation → "WordPress" tab - the code already contains your site ID. GPLv2+ licence.
PrestaShop
Download
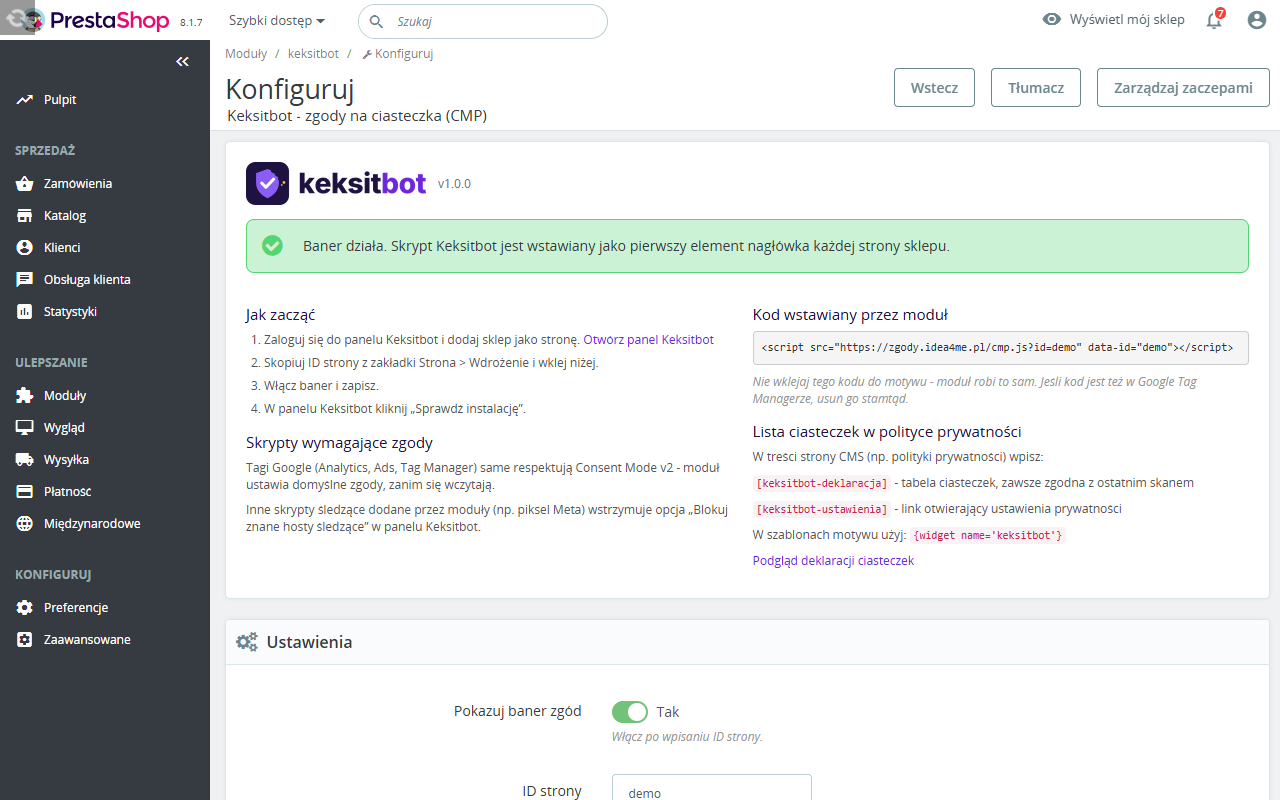
The module adds the script right after the opening <head>, before stylesheets and scripts of other modules. It adds a "Privacy settings" link to the footer and the [keksitbot-deklaracja] and [keksitbot-ustawienia] shortcodes for CMS pages.
Modules → Module Manager → Upload a module → choose the zip file.
Click "Configure" next to the Keksitbot module.
Paste the site ID, enable the banner and save.
In the Keksitbot dashboard add all store domains to the site (language versions too).
Finally click "Check installation" in the dashboard.
The module is awaiting submission to PrestaShop Addons. Until then install it from the zip file. The module rejects IDs with an underscore - the dashboard does not generate such IDs.
Full instructions in the dashboard - After logging in: Sites → your site → Installation → "PrestaShop" tab - the code already contains your site ID. MIT licence.
Google Tag Manager
Download
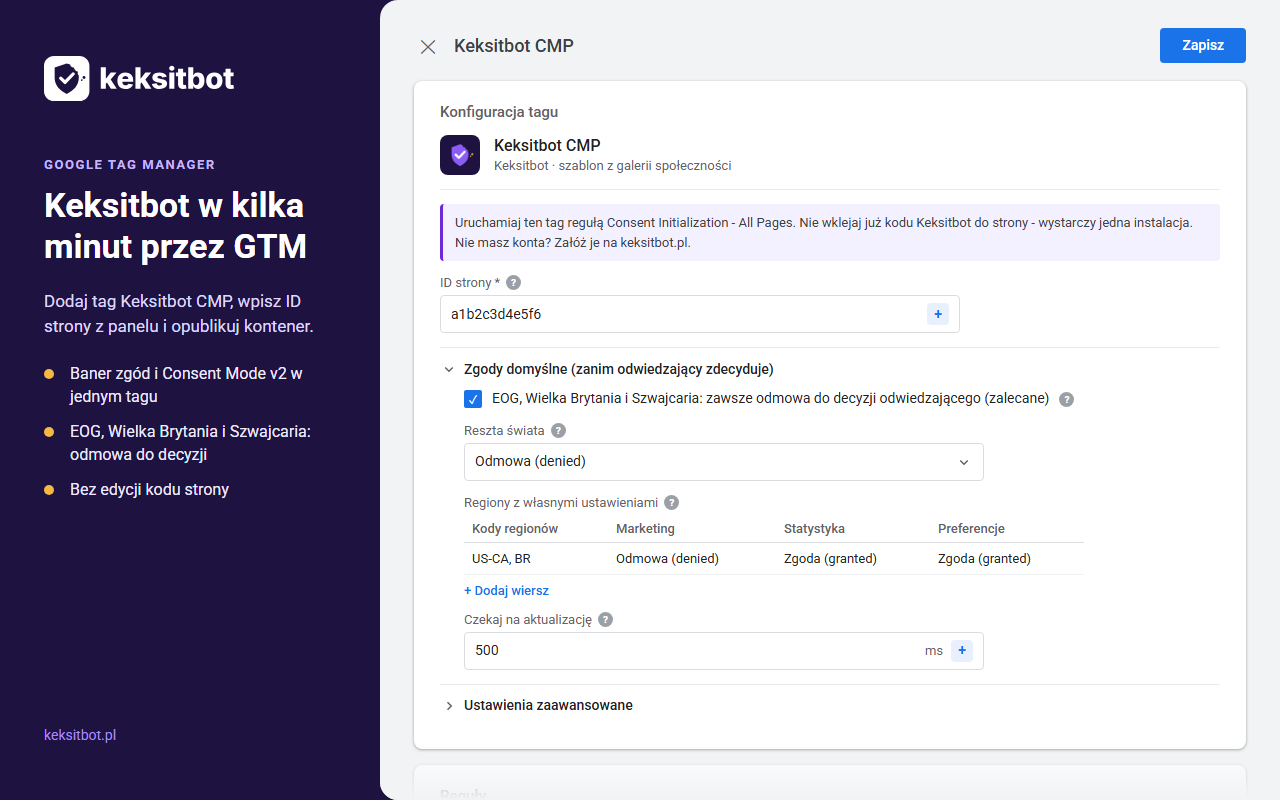
A tag template for Google Tag Manager: sets Consent Mode v2 defaults in the Consent Initialization trigger (EEA, UK and Switzerland: denied until the visitor decides), loads the Keksitbot banner and updates consent after the visitor's choice. No edits to the page code.
Requirements: A GTM web container. The template comes in the language of the GTM interface.
In GTM: Templates → Tag Templates → New → ⋮ menu → Import → choose the file → Save.
Tags → New → Keksitbot CMP, enter the site ID.
Trigger: Consent Initialization - All Pages.
Publish the container and check it in Preview mode (Tag Assistant → Consent tab).
Finally click "Check installation" in the dashboard.
With the template, turn off Banner design → Compliance → Google Consent Mode v2 in the Keksitbot dashboard so that consent does not come from two sources. If the code is already pasted in <head>, remove it. The template is awaiting submission to the GTM Community Template Gallery.
Full instructions in the dashboard - After logging in: Sites → your site → Installation → "Google Tag Manager" tab - the code already contains your site ID. Apache 2.0 licence.
Shopify
Code to paste
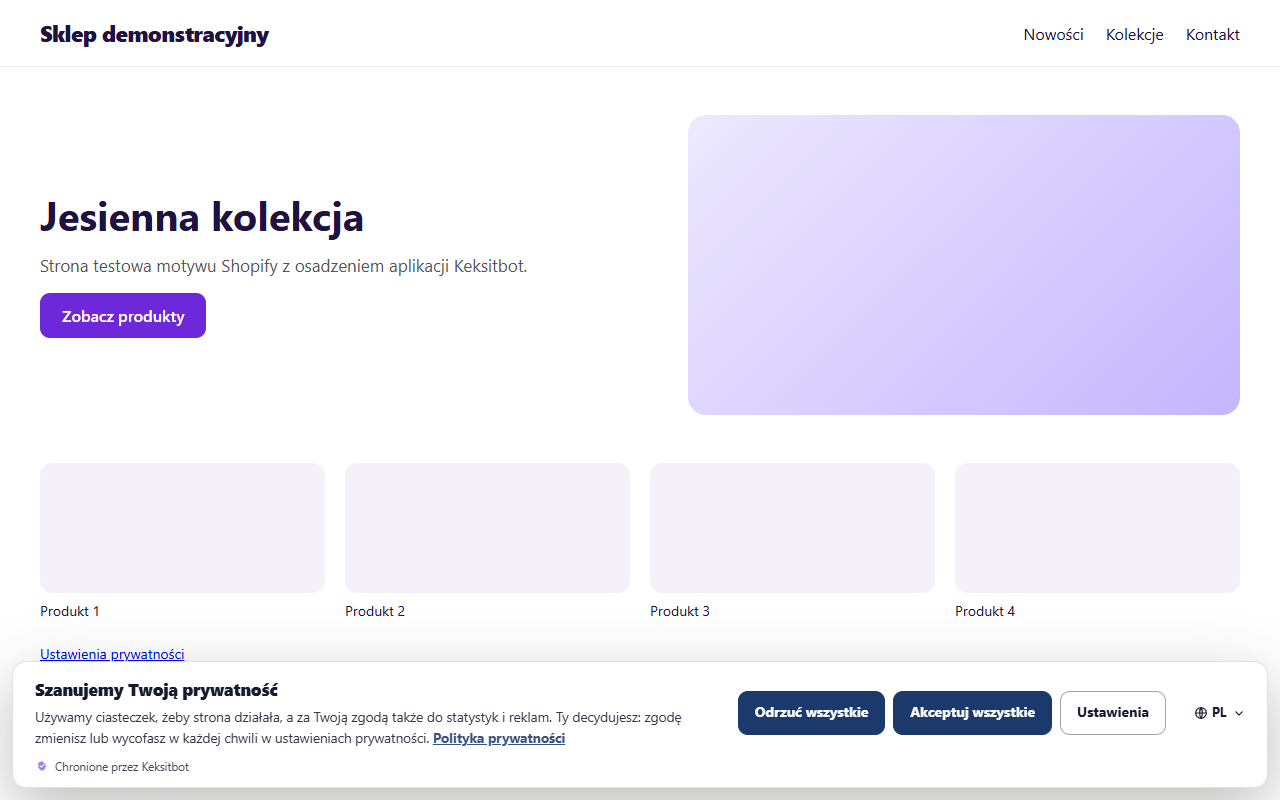
The Shopify app (theme app embed) adds the banner and passes every decision to the Customer Privacy API, so Shopify pixels, sales channels and checkout follow the same choice. Until the App Store listing, paste the code into the theme.
Requirements: Any Online Store 2.0 theme. The store address and *.myshopify.com added to the site in the dashboard.
Code for layout/theme.liquid (right after <head>):
Paste the code right after <head>, before Google Tag Manager and other scripts. Replace YOUR_ID with your site ID.
Settings → Customer privacy → Cookie banner: turn off the Shopify banner, keep the regions where consent is required. Add a footer menu item with the address #zgody-ustawienia.
Finally click "Check installation" in the dashboard.
The app is awaiting publication through a Shopify Partners account. After publication you only enable the embed in the theme editor and paste the ID.
For developers: Shopify app source
Source package of the app (theme app extension, bridge to the Customer Privacy API, tests). Deployment requires a Shopify Partners account and Shopify CLI.
Full instructions in the dashboard - After logging in: Sites → your site → Installation → "Shopify" tab - the code already contains your site ID. MIT licence.
React, Next.js, Vue (npm)
Download
The @keksitbot/consent library: loads the script without duplicates, TypeScript types, React component and hook, Vue plugin and composable. Works with SSR (Next.js, Nuxt, Remix, Astro). No dependencies, about 14 KB.
Requirements: Node 18 or newer. React 18+ or Vue 3 as optional peer dependencies.
// aplikacja bez SSR (Vite, Create React App, Vue SPA)
import { loadKeksitbot } from '@keksitbot/consent';

await loadKeksitbot({ id: 'YOUR_ID' });
Step-by-step installation
Install the package with the command below.
Next.js: the <KeksitbotScript id="…" /> component as the first element of <head> in app/layout.tsx. Vue: app.use(KeksitbotPlugin, { id: '…' }).
App without SSR: loadKeksitbot({ id: '…' }) at start-up. Mark scripts that wait for consent with type="text/plain" and data-zgoda.
Finally click "Check installation" in the dashboard.
The package is awaiting publication on the npm registry. Until then install it from the address above; after publication npm install @keksitbot/consent is enough.
Full instructions in the dashboard - After logging in: Sites → your site → Installation → "React / Vue" tab - the code already contains your site ID. MIT licence.
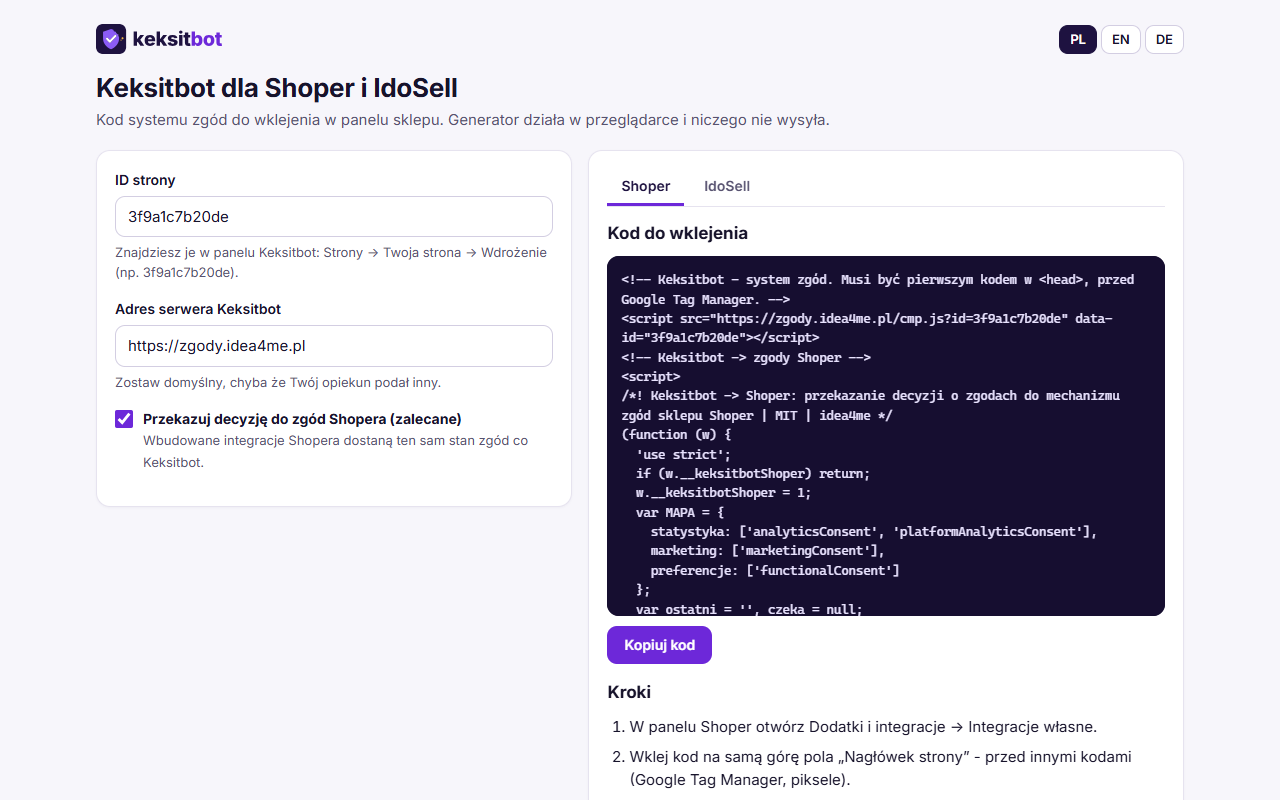
Shoper
Code generator
Code for the "Page header" field together with a bridge to Shoper's own consents, which the store's built-in integrations use (pixels added in the admin). The generator runs in your browser and sends nothing.
Requirements: Any Shoper plan. The consent bridge works with Storefront themes.
In the Shoper admin open Add-ons and integrations -> Custom integrations.
Paste the code at the very top of the “Page header” field - before any other code (Google Tag Manager, pixels).
Save. Mark Google Analytics, Ads and pixel code in the same field with type="text/plain" and data-zgoda="statistics" or "marketing".
Turn off the Shoper cookie information banner so visitors do not see two banners.
In the Keksitbot panel click “Check installation”.
Shoper decides the order of its own scripts in <head>. The “Page header” field does not guarantee our code runs before platform scripts - so turn on “Block known scripts” in Keksitbot.
Consent passing works with Storefront themes (Shoper Storefront API). In older themes the snippet does nothing.
The Shoper App Store app is ready and awaiting a partner account. After publication the code is added automatically.
Full instructions in the dashboard - After logging in: Sites → your site → Installation → "Shoper" tab - the code already contains your site ID. MIT licence.
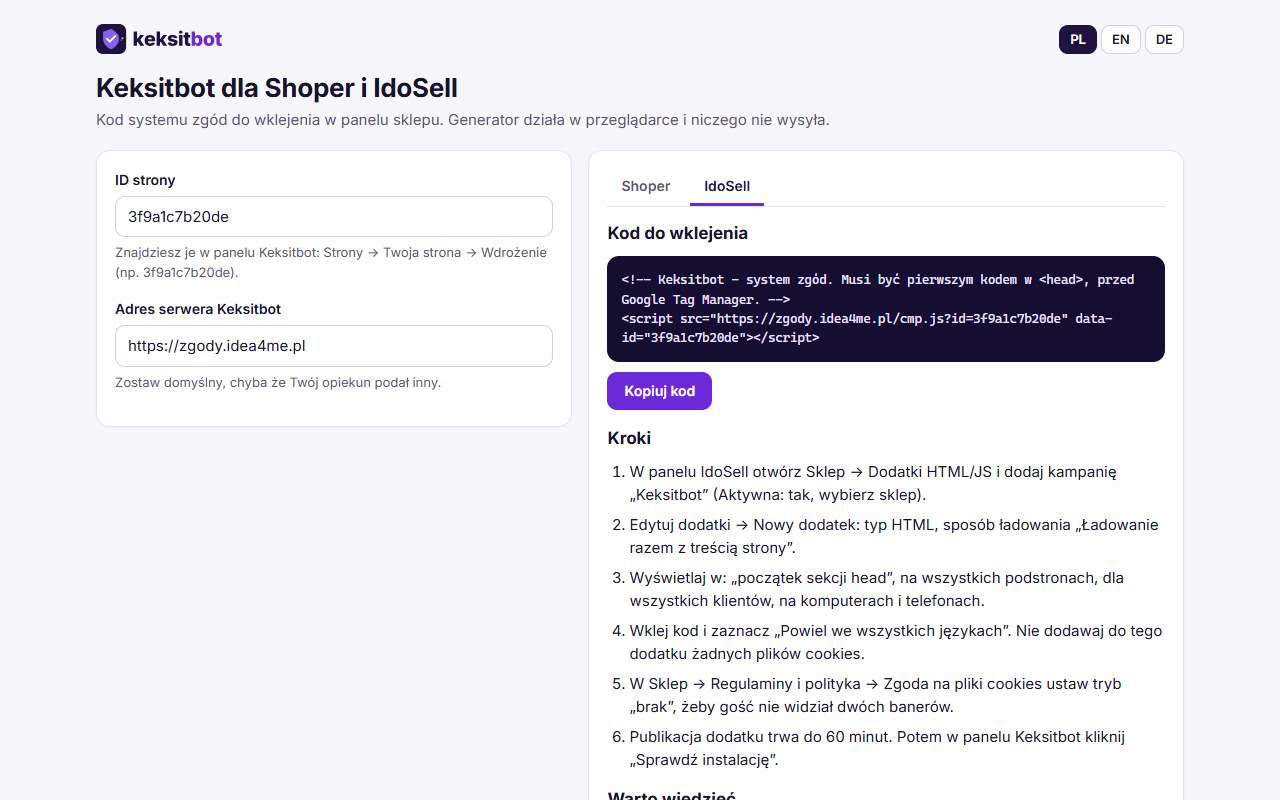
IdoSell
Code generator
Code as an HTML/JS add-on at the beginning of the <head> section, loaded with the page content. The generator prepares it with a comment for the person pasting the code in the shop admin.
Requirements: Any IdoSell plan. Publishing an add-on takes up to 60 minutes.
In the IdoSell admin open Shop -> HTML/JS add-ons and add a “Keksitbot” campaign (Active: yes, pick the shop).
Edit add-ons -> New add-on: type HTML, loading “Load with page content”.
Display in: “beginning of the head section”, on all pages, for all customers, on computers and phones.
Paste the code and tick “Copy to all languages”. Do not attach any cookies to this add-on.
In Shop -> Terms and policies -> Cookie consent set the mode to “none” so visitors do not see two banners.
Publishing takes up to 60 minutes. Then click “Check installation” in the Keksitbot panel.
In “none” mode IdoSell does not ask for consent, so load analytics and ad add-ons as code with type="text/plain" and data-zgoda, or through GTM with Consent Mode. Turn on “Block known scripts” in Keksitbot.
IdoSell lets you target tablets only with AJAX loading. Check the banner on a tablet after publishing.
The IdoSell Apps app is ready and awaiting a partner account. After publication the code is added automatically.
Full instructions in the dashboard - After logging in: Sites → your site → Installation → "IdoSell" tab - the code already contains your site ID. MIT licence.
HTML by hand
Code to paste
Any other website: one <script> tag as the first element of <head>. The server appends the options itself (blocking, Consent Mode, visitors outside the EEA), so changing settings in the dashboard does not require pasting the code again.
Paste the code as the first element of <head>, before Google Tag Manager, gtag.js and other scripts. Replace YOUR_ID with your site ID.
Scripts that wait for consent: type="text/plain" and data-zgoda="statystyka" or "marketing". Videos and maps: data-src instead of src.
Add the link <a href="#zgody-ustawienia">Privacy settings</a> to the footer and <div data-zgody-deklaracja></div> to the privacy policy.
Finally click "Check installation" in the dashboard.
Optimisation plugins (bundling, deferring scripts) must skip this script - otherwise the Consent Mode defaults are set too late.
Does your site send a Content-Security-Policy header? Add https://zgody.idea4me.pl to script-src and connect-src (and to img-src if the banner logo is hosted on our server). The banner styles do not need 'unsafe-inline'. If your CSP uses a nonce, put the same nonce on the Keksitbot script tag and on scripts waiting for consent (type="text/plain") - after consent Keksitbot runs them with that nonce. Older browsers (Safari before 16.4, Firefox before 101) get the banner styles as a <style> element with that nonce.
Full instructions in the dashboard - After logging in: Sites → your site → Installation → "HTML" tab - the code already contains your site ID.
Shoper · IdoSell
Code generator for Shoper and IdoSell
Enter the site ID and copy the code into the shop admin. The generator runs in your browser and sends nothing. Script server address: https://zgody.idea4me.pl.
Find it in the Keksitbot panel: Sites -> your site -> Installation (e.g. 3f9a1c7b20de).
Steps
Good to know
Code to paste
What each integration can do
Every method adds the same banner and the same consent log. They differ in how much they do on their own.
Cookie table and settings link (shortcodes, blocks)
yes
yes
-no
-no
-no
-no
-no
-no
"Privacy settings" link added automatically
yes
yes
-no
yes
-no
-no
-no
-no
Consent Mode defaults set by GTM (regions, wait_for_update)
-no
-no
yes
-no
-no
-no
-no
-no
Decision passed to the platform's consents (Shopify, Shoper)
-no
-no
-no
yes
-no
yes
-no
-no
TypeScript types, React and Vue components, SSR
-no
-no
-no
-no
yes
-no
-no
-no
"Check installation" in the dashboard
yes
yes
yes
yes
yes
yes
yes
yes
In preparation: listing in the directories
The packages on this page are ready and tested. Listing in the official directories requires company accounts and each platform's approval - until then you install from the file.